
|
|
How to install an electronic boost controller Disclaimer Please note that I am not a mechanic by trade and that I nor Turbocelica.nl can be held responsible for any damage, injuries or death caused by work you perform using this website as a guideline. Make sure your T-VSV system is disconnected before you install a boost controller. Though this guide is based on an HKS Electronic Valve Controller (EVC, boost controller), most of them use the same connections. Make sure you have your stereo-code ready when you reconnect the battery after installation (if your stereo locks itself in such a situation). Parts and tools needed HKS EVC boost controller 1 m of 6 mm inner diameter (ID) vacuum hose hose clamps for the above hose Medium Phillips screwdriver Sharp knife Soldering iron (if you choose to solder)  Disconnect the battery To keep things safe, disconnect the negative terminal of the battery. The installation basically consists of two parts: 1) Electrical wiring 2) Installation of the solenoid and vacuum hoses We start with the engine bay. Mount the solenoid on a dry location, for instance near the firewall. The HKS manual states the nipples have to point upwards. The solenoid has three nipples. The left and middle one need to be connected with the turbo. Take off the intake parts before the turbo to create space. Take off the little hose connected between the turbo and wastegate actuator; the EVC will be placed in between these points so it can alter the vacuum signal to raise the boost. Using the supplied 6 mm ID hose, connect the actuator to the left 6 mm nipple on the EVC solenoid. Use the additional 6 mm hose to connect the middle solenoid nipple with the one on the turbo. The smaller right nipple of the solenoid needs to be connected with a vacuum source. There are several points for this, for instance: 1) 8mm nipple on the side of the intake manifold. Use an adapter to change the hose ID from 8 to 4 mm to fit the solenoid nipple. 2) 8mm nipple on the back of the intake manifold. Use an 8 to 4mm adapter. 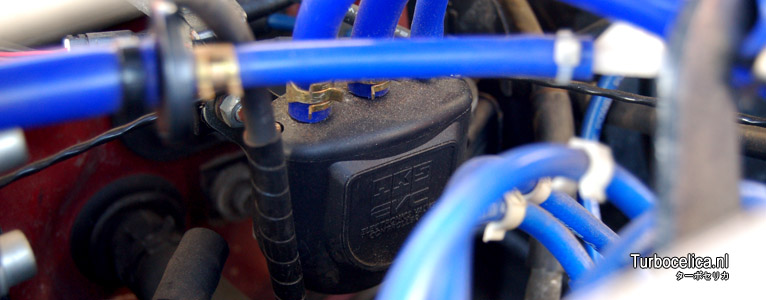 Interior The EVC control unit has three connectors on the rear as well as a little switch. The left one (looking from the rear) needs to be connected with the display, the middle one with the solenoid and the right one is to connect power (+ and ground). Set the switch to the appropriate position - internal (stock) or external wastegate. 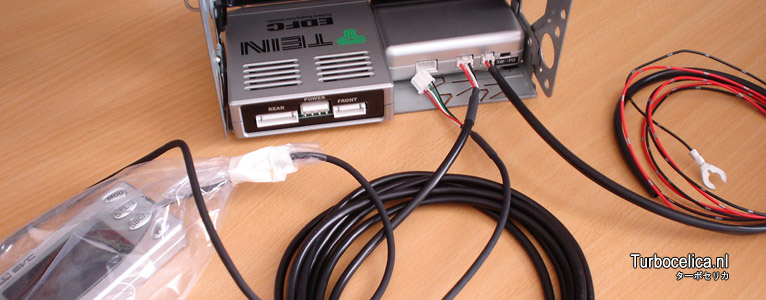 I removed my cup holder and installed a bracket for the TEIN EDFC controller and HKS EVC control unit Connect the solenoid cable with the control unit. A possible route is through the rubber grommet near the wiper motor, through the wheel well, through the grommet in front of the driver's door (LHD car) behind the dashboard, to the center console. Depending on the EVC location, choose a power source - for instance the cigarette lighter. Hook up the power wiring. Before you tidy up the interior, reconnect the battery and make sure the boost controller powers up. Job done! To set your boost controller up, please refer to the manual. Incorrect settings can cause severe engine damage. On a standard ST185 (depending on engine condition and ECU fuel cut) 1.0 bar is considered a safe maximum.  HKS New EVC boostcontroller How to.. How to disconnect the T-VSV system Top |
|
|