
|
|
How to install a turbo timer Disclaimer Please note that I am not a mechanic by trade and that I nor Turbocelica.nl can be held responsible for any damage, injuries or death caused by work you perform using this website as a guideline. This guide is based on the HKS Type-1 turbo timer, using the HKS harness for Toyota (TT-3, HKS part number 4103-RT003). The timer comes with an English manual. If you're not using the harness, follow the instructions in the manual regarding wiring the timer to the key switch. Make sure you have your stereo-code ready when you reconnect the battery after installation (if your stereo locks itself in such a situation). Parts and tools needed HKS Type-1 turbo timer HKS TT-3 turbo timer harness Basic socket set Medium Phillips screwdriver Soldering iron (if you choose to solder)  Disconnect the battery To keep things safe, disconnect the negative terminal of the battery. To connect the harness in between the key switch connector, you will have to remove the lower part of the dashboard beneath the steering column. This panel is mounted with six screws - two on the upper left corner, two on the upper right corner under a plastic cover, and one on both of the lower corners. To get to the lower left (LHD car) corner, you might need to remove the drivers side plastic sill cover. Once you have the lower part of the dashboard removed, you see the big white key switch connectors. Unplug them and click the HKS harness in between: 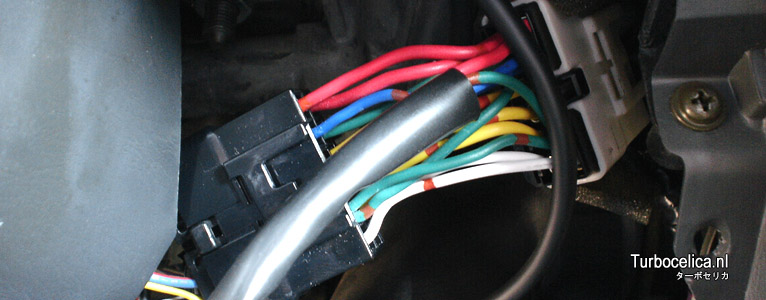 Locate the ECU. In the ST185 the ECU is mounted behind the dashboard. To simplify this installation, remove the carpet a bit in the passenger side foot well. You can unplug the three grey connectors to create some space to work: 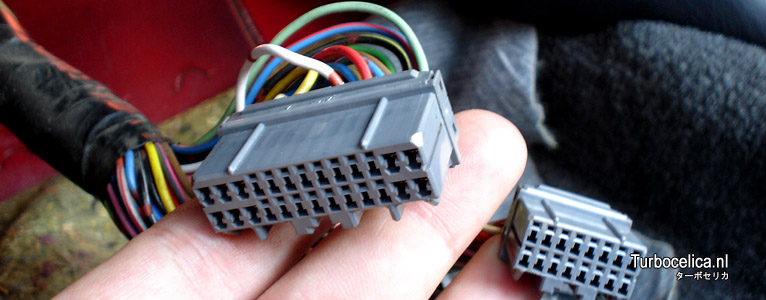 Locate the RPM and speed signal pins. The turbo timer needs these signals to display RPM and speed: 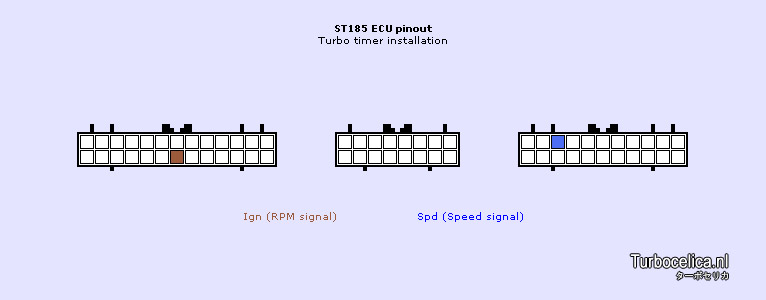 To splice the I and S signals, you can use splice connectors such as the ones supplied with the turbo timer or solder the wires. Connect the supplied brown wire to the RPM signal, which is a white wire with brownish rings on it, which will be clear when comparing the ECU with the diagram above. Connect the blue supplied wire to the speed wire, which is a white and blue striped wire coming out of the third connector. The pictures below show these connections: 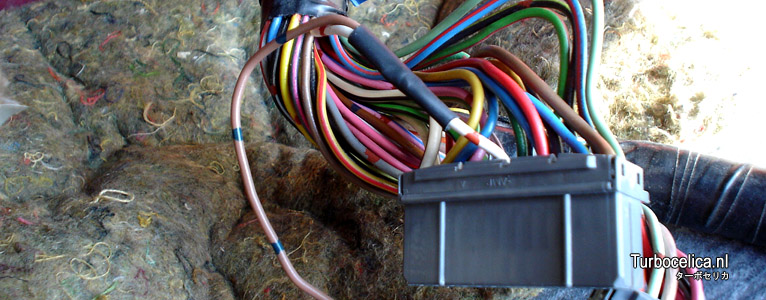 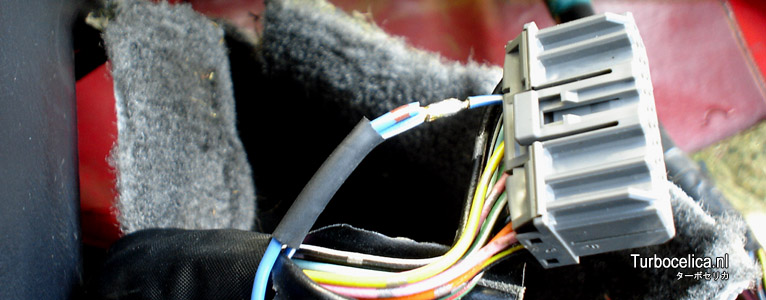 To connect the grey supplied wire to the handbrake sensor, you need to remove the handbrake surrounding. It's mounted with four screws (front and rear sides) and two bolts inside the armrest compartment. You can clearly see a black sensor connector, which you can splice for the turbo timer wire. You can route the wire through the tunnel, beneath the shifter, back to the timer. Connect the timer to the harness using the big white connector and connect the brown, blue and grey wires to the corresponding connectors coming out of the turbo timer. Ground the system by mounting the black wired clip to the chassis. Before you tidy up the interior, make sure the timer works with all connected signals. Job done!  HKS New Type-1 turbo timer How to.. Top |
|
|